Get peace of mind with permissions
We're off to a solid start for 2018 here at Gloo, and we're welcoming it with a round of new Product Updates - starting with the launch of our new Roles and Permissions. Every member of a Champion organization has a role, and now each role has its own level of access, suited to their goals.
Gloo has developed Roles to help Champion organizations protect their work and brand by effectively managing the right roles for their members.
|

Member Management: The Types of Roles in Gloo
-
Super Admins -
Super Admins control the highest-level security and administrative settings, as well as all Agent and Author capabilities. This is every role, rolled into one!
- Admins - Admins can manage members, settings and maintenance tasks for a Champion organization.
- Agents - Agents are Champion members with access to Console.
- Advanced Agents - Advanced Agents have access to Console, with more control over the onboarding experience. They can create Advanced Invitations, and have more user management ability.
- Volunteer Agents - Volunteer Agents have the same functions as Agents, but the role helps distinguish when someone is acting in a volunteer capacity.
- Authors - Authors are able to curate Collections on behalf of a Champion.
- Advanced Authors - Advanced Authors can curate Collections, as well as create Programs and Assessments for the Champion.
- Brand Reps - Brand Reps serve as social media managers. They determine which images and content are found on a Champion's Feed.
 |
EM'S PRO TIP
Using Roles can also improve the onboarding experience.
When training and onboarding a new Champion member, Super Admins can filter how much the new member can see.
Focusing the scope of their role(s) can help them better understand their job's functions, without getting overwhelmed with advanced features.
|
|
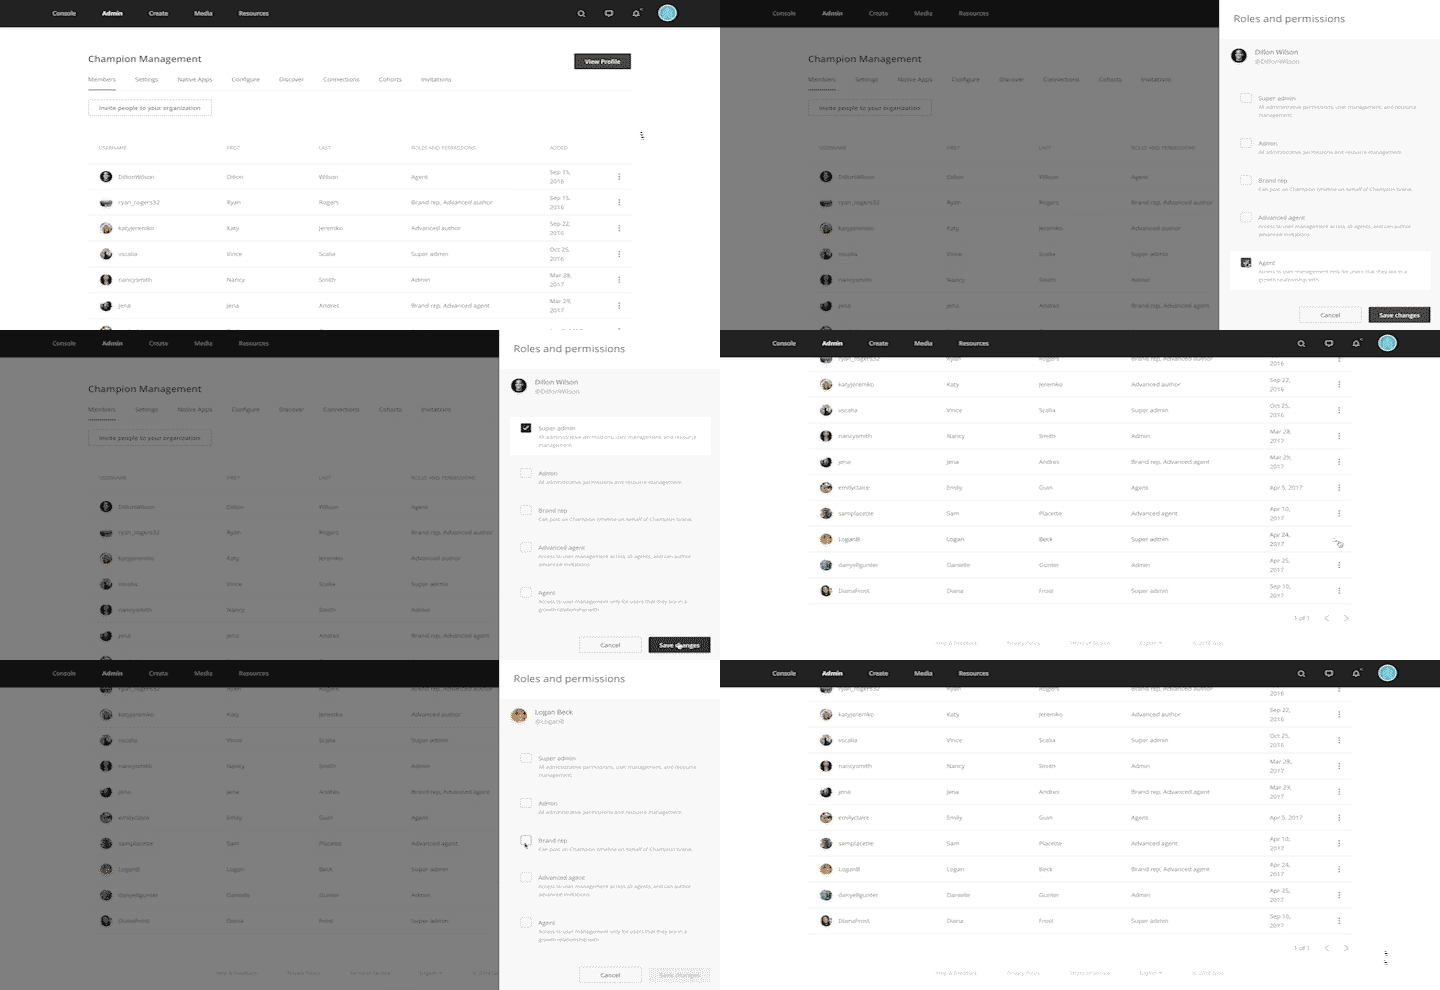
Here's How it Works (in a nutshell):
1. In your Admin tab, under the 'Members' section, hover over a Champion member's options
2. Click on the gear icon to access Roles and Permissions
3. Check the boxes next to the appropriate Roles, and Save Changes
4. Well done!
For an in-depth look at each Role, and more step-by-step instructions for how to manage your settings, check out the article here.


